Everyone loves a car with a smooth and silky finish, but not many know how to achieve it. Over time, vehicles lose their glossy appearance due to dirt and contaminants embedded in their clear coat. Unfortunately, while most of the dirt can be removed by merely washing, the more ingrained contaminants cannot. This is the reason for clay barring—to eliminate these persistent impurities.
It’s always a great idea to give your car a clay bar treatment after a while of usage. However, if done wrongly, you may do more harm than good. This article contains everything you need to know about how to clay bar a car correctly.
What You Need to Clay Bar a Car
When performing a clay bar treatment, you’ll need some tools. Of course, you should already have most of these lying around. Here’s the list:
Clay Bar
It goes without saying that you’ll need a clay bar to clay bar your car. Generally, clay bars come in sizes of 2 to 8Oz. The 2Oz clay bars are usually sufficient for treating three to four vehicles. They can also last between 18 months and two years when used on the same car. Nonetheless, if you choose to go for a bigger clay bar, you can cut it into sections with a sharp knife or scissors and seal up the pieces you’re not going to use immediately in a sandwich bag.
Microfiber Towels
Microfiber towels are crucial to auto detailers when performing any detailing task on a car. They are used to clean and dry the surface of your car without leaving any scratches or faint swirl marks on the surface of your vehicle. The clay bar process is no exception, and you’ll need them here too.
Detailing Spray or Clay Lubricant
The essence of a detailing spray is to keep the clay bar lubricated at all times and prevent it from sticking on your car’s paint and damaging it. It helps to create a clear coat over the vehicle’s surface to prevent blemishes and clay bar residue from getting on the car’s surface.
If you don’t have a spray, a slippery car wash soap in water will lubricate the car’s surface just fine. It just won’t leave you with a finish that’s as shiny. That said, a wash and wax soap could help a little, and we’ve recommended a good one in our car wash soap review.
That aside, let’s look at the steps involved in using a clay bar correctly!
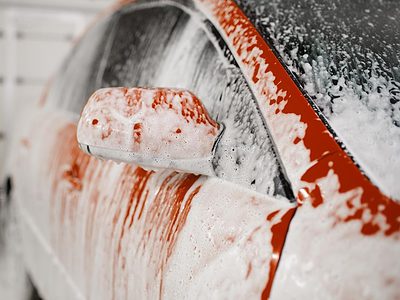
Step 1: Wash and Dry Your Car
This is a significant step in any detailing job. A hand wash is preferable to an automatic one. So, start by washing your car from top to bottom with a good car wash mitt or microfiber towel, soap or shampoo, and a good ol’ bucket of water or foam cannon.
Scrub thoroughly until you’ve lifted all the stains and loose dirt from your paintwork. Then, rinse your car with a garden hose, and dry with a clean microfiber towel afterward.
Step 2: Manipulate the Clay Bar
Before starting your clay bar treatment, make sure the clay bar is pliable. Start taking out the clay bar and separating it into equal halves or quarters. Return one of the halves to the package and shape the other half into a flat disk about the size of your palm.
You only need as much clay as you can hold well with your hand, so you don’t drop it while washing—a dirty clay bar would do more harm than good. If you do drop the clay bar, do not re-apply it to the car because it’ll damage the paint. You should throw it away instead unless you can somehow manage to cut off the dirty part.
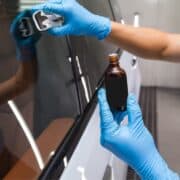
Step 3: Apply Clay Bar Lubricant
Clay bar detailing needs to be done in small sections. So, begin by spraying a small aspect of your car with clay lubricant or soapy water, starting with cleaner surfaces such as the roof before working your way to the more contaminated areas. This helps to ensure your clay bar doesn’t get covered in debris very quickly.
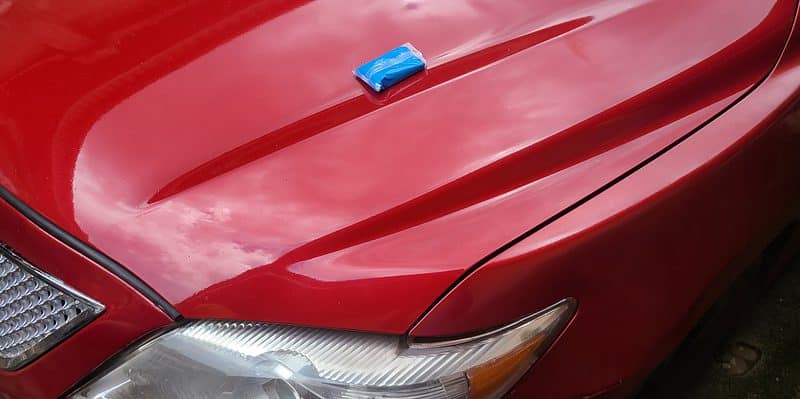
Step 4: Start Clay Bar Treatment
Gently rub the clay over the surface of your car using a back-and-forth motion to pull contaminants from your paint finish. Avoid circular motions as you are more likely to leave scratches and swirl marks using it this way, defeating the purpose of a clay bar treatment.
Despite spaying the appropriate fluids, it’s normal for it to initially feel challenging to pull the clay bar across your car surface. This is because there are a lot of impurities present for the clay bar to stick to. However, as you continue, the surface becomes smoother and the gliding easier.
When it feels effortless to move the clay across the surface, you know that section is complete and can move on to the next.
Step 5: Check and Rotate the Clay Bar
Always check the clay bar to ensure you’re using a clean side. Once you’ve used both sides of the clay in picking up surface contaminants from one area, fold the clay a few times, press it, straighten it, and continue. Constantly ensure the impurities on your clay are not causing damage to your paintwork. If unsure, take a fresh piece.
Step 6: Wipe With a Microfiber Cloth
Once the coat feels completely smooth, put the clay bar in a safe place and take a clean microfiber towel to dry the surface. Dry each surface where you used a clay bar to remove contaminants and spray lubricant.
Repeat the whole process from step two on a new surface over and over again until your car is spotless.
Step 7: Apply a Car Wax
Lastly, apply car wax to protect your car’s paint after clay barring. A clay bar essentially cleans off the topmost layer of your car’s coat. Thus, you’re leaving it without any protection. For this reason, you should always follow up with paint sealants or wax after giving your car a clay bar treatment.
Clay bar your car like a pro
And just like that, you’ve learned how to clay your car like a pro! If you own a black car, you know it requires a special kind of maintenance. Check out our article on washing a black car.
FAQs
How Often Should You Use a Clay Bar?
This depends on several factors including how often you drive your car, how often you wash it, whether or not it’s waxed/coated, and the environment and weather conditions you drive in. The easiest way to know when your car needs a clay bar treatment is to carry out a touch test. Wrap your hand in a plastic glove or bag, and glide it over the vehicle’s finish. If it feels rough, then your car certainly needs a clay treatment.
Do Brand New Cars Need to be Clayed?
Yes, definitely! Brand new cars usually sit in parking lots and shipping docks long after they’re built. During this period, they are highly exposed to industrial fallout. Most of them also spend time on trains and trucks to get to their final destinations, where they sit in lots some more! It’s very common to find rail dust on brand-new vehicles. So, it’s in order to give your brand new car a clay bar treatment to remove these impurities.
What are the Dangers of Using a Clay Bar?
Although clay bars offer great benefits, they could do serious damage if misused. The most important thing to remember while working with a clay bar is to keep the surface you’re working on heavily lubricated. Clay bars feel smooth, but in reality, they are rough and abrasive. So, unless kept wet, there is a possibility that they’ll rip or peel off the coat of your car. You also don’t want to use a clay bar that’s riddled with dirt as it is just as bad.
You may also like

Best Car Microfiber Towel for 2023: Detailing Made Easy
How Much Does a Car Wash Cost in 2022?