Your car battery is essentially the life force of your car and, as such, should be taken good care of to maintain its efficiency. However, no matter of cautious you are in caring for your battery, it’ll eventually get weak, albeit at a natural and slow rate, until something’s done.
You could opt to get one of the best batteries on the market for around $200 or more. Alternatively, you could apply simple and efficient battery reconditioning methods to give life back to your old and weary battery while saving the extra cash you’d have spent on that new battery purchase.
If that sounds like a plan, keep reading to learn how to recondition a car battery alongside a few dos and don’ts of the process. But before we get started, what is battery reconditioning?
What is Battery Reconditioning?
Battery reconditioning is the process of restoring a battery to full functioning capacity. It involves removing sulfate from the plates of a battery, allowing for a more efficient charge and renewed battery life. It also strengthens the electrolyte chemicals in that battery, helping it regain almost 100% of its strength.

How to Recondition a Car Battery at Home
Reconditioning your car’s battery is not something that should be limited to the mechanic—you can also do it! With a few basic materials and safety equipment, you can follow this DIY battery reconditioning guide to restore a dead car battery.
Once you’ve confirmed the battery has not sustained any damages, proceed with the dead battery reconditioning process. But you’ll need a few items, many of which you already have somewhere in your home.
- Protective clothing/apron
- Safety goggles
- Gloves
- Battery charger
- Voltmeter
- Load tester
- Funnel
- Two large buckets (preferably plastic)
- Distilled water
- Epsom salt
- Baking soda
- Old toothbrush
- Steel wool (for hard corrosion)
- Toolkit with a flathead screwdriver
Once you have your equipment ready, here are the step-by-step procedures you should take to recondition your battery successfully:
Step One: Prepare Yourself
There is no better way to start any task, be it challenging, physical, or hazardous, than to dot your Is and cross your Ts. Make sure you wear the necessary protective materials and safety goggles. And ensure that all the required materials are available and in good condition before you proceed.
Step Two: Prepare the Battery
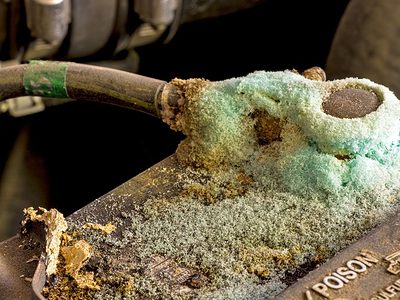
In this step, you will need baking soda solution, a toothbrush, and a battery terminal cleaner. In the absence of the latter, steel wool is a helpful alternative. The aim of this stage is to rid the battery of greenish-white particles that have built up around its terminals.
To do this, mix baking soda and water in a ratio of 2:1 to make a runny paste. Pour this on the terminals. A chemical reaction may occur; this is fine. Afterward, clean the positive and negative terminals thoroughly with the toothbrush to remove corrosion. Use steel wool if the corrosion is hard. Make sure all heavy deposits are gone, then wipe and dry off the terminals for the next step.
Step Three: Check the Battery Voltage
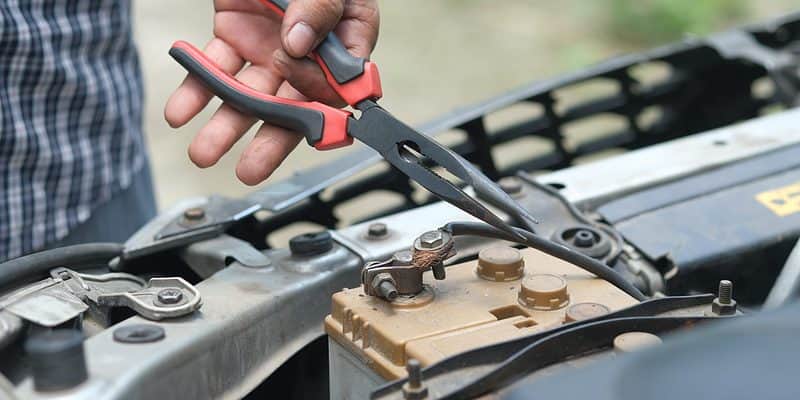
Once you have removed corrosion from the battery terminals, you’ll need to check the battery’s voltage using a voltmeter. Approach this in the same manner as you would jump-start a car—the red cable goes to the positive terminal, and the black cable goes to the negative terminal. Then, check the reading.
If your voltmeter reads above 12.6 volts (preferably 12.4–12.8V), your journey ends here—the battery is still in good condition and does not need reconditioning or changing. Readings between 10.5 and 12.4 volts indicate that the battery needs to be restored to full function, while below 10 volts indicates an urgent need for reconditioning. So, if the battery falls below 12.4 volts, it’s time to proceed to the serious stuff!
Step Four: Empty the Battery
The goal is to get the old electrolyte solution out of the battery cavity. You’ll need a screwdriver, baking soda, and a large bucket.
Warning
For obvious reasons, care should be taken when working with battery acid. You don’t want to spill such corrosive liquid on your skin or eyes! Therefore, safety goggles and gloves are a must-wear at this stage.
To begin the emptying process, carefully remove the top caps from the battery with a screwdriver and keep them in a safe place. Then, pour the electrolyte solution conscientiously into the large bucket without spilling any.
Note
Before disposing of the old battery acid solution, neutralize it by pouring 500 grams of baking soda powder into the bucket.
Step Five: Clean the Battery Cells
The aim of this stage is to get the sulfates out of the battery cavity by cleansing. A funnel, baking soda, and distilled water will be required.
Like before, a thorough mixture of baking soda and water in a 2:1 ratio should be poured into the battery cells until full, using the funnel. Cover the battery with its top cap and shake gently for up to a minute—expect it to be heavy. Re-open the battery and pour the mixture into the large bucket.
Step Six: Replace the Electrolyte in Battery Cells
This is the stage of actual battery reconditioning with Epsom salt, where the salt solution replaces the old electrolytes in the cell. You’ll need warm distilled water, a clean funnel, a clean bucket, and of course, Epsom salt.
Distilled water is required because it lacks any additional minerals you would find in regular tap water. These compounds can significantly decrease battery life. You can check out this CNET article on making distilled water at home.
To make the solution, pour Epsom salt (about 120g) into 1 liter of warm distilled water in a clean bucket. Slowly mix until the solid dissolves and the water retains a clear color. Next, refill the battery cells with the solution using the funnel. Finally, replace the battery cap and shake the battery gently for an even distribution of the Epsom salt solution.
You can expect the Epsom salt to keep the battery plates from sulfating and raise the amperage and voltage, leading to longer battery life and restoring its former power.
Step Seven: Charge the Battery
You only need a battery charger for this step. Set the reconditioned battery in a stable area and charge it up slowly and with low power over the course of 24 to 36 hours. If you’re unsure how, check out our article on how to recharge a car battery.
Step Eight: Retest the Battery
Just like in step three, we’ll test the car battery to see the results using a voltmeter. Again, connect the leads (red wire to the positive and black wire to the negative). Your battery is expected to read between 12.42V to 12.6V volts. If it’s lower, you should charge it again for about 12 hours before retesting.
Next, you need to test the battery under load using a load tester. This involves using a load-testing device that can be bought from any hardware store. If the reconditioned battery successfully maintains 9.6V for 15 seconds at half the Cold Cranking Amp (CCA) rating, it has passed the load test.
In that case, congratulations! You have successfully reconditioned your car battery. If it does not read 9.6 volts, it signals incomplete reconditioning. So, allow the battery to continue charging for some time and try again.

Why Would You Want To Recondition Your Car Battery?
Reconditioning is important in weak batteries because of the sulfation in their plates. Sulfation means a sulfate discharge on the positive plates inside the car battery. It causes an overall reduction in the battery’s capacity, longer recharge times, and higher battery temperatures, all of which reduce battery efficiency.
However, following this guide on reconditioning a car battery will remove that harmful sulfate from the battery plates and enhance performance. It must be noted that reconditioning can neither repair nor replace missing bits of battery plates, as its only function is to remove the sulfates building up on those plates.
When Shouldn’t You Recondition a Battery?
Your battery voltage can tell you can tell when you need to recondition and when not to. In this case, any battery with a voltage greater than 12.6 volts does not need reconditioning. If the voltage is between 10–12.4 volts, you should attempt to restore the battery to full function, and any battery with a voltage below 10 volts needs reconditioning.
Also, after a battery has been reconditioned multiple (up to three) times, it gets to a point where it cannot be made use of again, and further reconditioning should not be done.
How long will a reconditioned car battery last?
A newly reconditioned battery can function adequately for about a year before needing another procedure. This should mean that, in theory, you should be able to extend your car’s battery life by at least three years by repeating the process a few times.
Conclusion
Most car batteries tend to last an average of three to four years, after which they’ll need to be changed. But reconditioning is an excellent way to extend the lifespan to the maximum and keep them going considerably longer while saving money and helping the ecosystem. So, follow these steps to recondition a car battery to save yourself the money you would have spent on new batteries.
FAQs
What’s the difference between reconditioning and recharging?
Battery recharging is simply charging a weak battery for a certain amount of time until it becomes full. In contrast, battery reconditioning is the revival of a battery that can no longer hold a charge to its full capability. Plus, reconditioning also involves charging.
How Much Does It Cost to Recondition a Car Battery?
There’s no one-size-fits-all price tag on battery reconditioning. It depends on which of the necessary materials you already own and which you need to buy. However, it’s still far cheaper than buying a new battery.
How Long Does It Take To Recondition a Car Battery?
Reconditioning a car battery usually takes between one and two days. This period includes the time to make distilled water and charge the battery, with charging alone taking up to 24 hours to 36 hours.
Can Other Types of Batteries Be Reconditioned?
Yes. Aside from lead-acid batteries, lithium-ion, NiMH, or NiCad laptop batteries are suited for reconditioning. Hybrid batteries can be reconditioned too. However, the process is different for each battery type due to variations in chemical composition.
What Is the EZ Battery Reconditioning Program?
The EZ Battery Reconditioning program is an online program created for the fixing, recharging, and reusing of batteries. The EZ Battery Reconditioning program covers a range of batteries, including lithium-ion, alkaline, lead-acid, laptop batteries, and others.


