The benefits of ceramic coating your car are numerous, from scratch and UV protection to a superior shine that’ll put a diamond’s sparkle to shame. But applying it seems like a herculean task. Fear not.
This article will walk you through the process, providing a step-by-step guide for applying the best ceramic coating on your car.
What Is Ceramic Coating?
A ceramic coating is a silica dioxide (SiO2) liquid polymer applied to a vehicle’s exterior paintwork to protect it from environmental contaminants and provide long-lasting, durable, and hydrophobic (water-repelling) properties.
Ceramic coatings are known for their ability to create a protective barrier on the paint surface, which can resist UV rays, oxidation, acid rain, bird droppings, dirt, and other harmful substances. They also provide a glossy and slick finish, making the car easier to clean and maintain.
What You’ll Need
Before you start the ceramic coating process, you’ll need to gather a few supplies. Here are the essential items you’ll need:
Ceramic Coating
Pretty obvious right? Choose a high-quality ceramic coating product from a reputable brand. Read the manufacturer’s instructions for application and curing time.
Microfiber Towels
You’ll need a set of clean and lint-free microfiber towels for various steps, including wiping down the car’s surface and buffing off excess coating.
Car Wash Soap
Get one of the best pH-neutral car wash soaps to clean the vehicle thoroughly before applying the ceramic coating.
Clay Bar Kit
A clay bar kit helps decontaminate the paint surface by removing embedded dirt, grime, and contaminants that cannot be removed by regular washing.
Polish and Polishing Pad (Optional)
This is only required if the paint surface has swirl marks, scratches, or other imperfections. In that case, you’ll need a polish and a polishing pad to correct them before applying the ceramic coating.
Isopropyl Alcohol; IPA (Optional)
IPA is used as a final cleaning step before applying the ceramic coating to remove any residues and ensure a clean surface for the coating to bond properly.
Applicator Pad or Cloth
You’ll need a soft and lint-free applicator pad or cloth to apply the ceramic coating evenly onto the paint surface. Most brands bundle one with the ceramic coat.
How To Ceramic Coat a Car: A Step by Step guide
Here’s how to ceramic coat a car yourself, one step at a time:
Step 1: Wash the Exterior
Start by washing the exterior of the car thoroughly. Use a car wash soap and a microfiber towel to clean off any dirt, dust, or grime. Rinse the car with a water hose and let it dry. See our detailed guide on how to wash a car properly.
Tip
Do not use dish soap or household cleaners, as they can strip off existing wax or sealants and affect the bonding of the ceramic coat.
Step 2: Decontaminate/Clay Bar the Paint
After washing the car, use a top-quality bug spray to remove dried-on tar, bugs, or tree sap. Also, clay bar the car to eliminate any contaminants embedded in your clear coat. If you’re not sure how to go about it, see our article on clay barring a car.
Tip
If the clay bar becomes dirty or contaminated, fold it to reveal a fresh, clean surface. After doing that several times and the bar becomes saturated, discard it for a fresh piece to avoid scratching the paint surface.
Step 3: Remove Paint Scratches
This is not a compulsory step for a DIY ceramic coating task. However, if your car’s paint surface has swirl marks, scratches, or other imperfections, address them with polish and a polishing pad. After polishing, wipe down the paint surface with a microfiber towel to remove any polish residues.
Note
Paint correction is time-consuming and requires skill and experience to avoid causing further damage to the paint surface. If you’re not confident in your abilities, seek professional help or skip paint correction altogether.
Step 4: Isopropyl Alcohol (IPA)
Once the surface is clean and free of contaminants and imperfections, use isopropyl alcohol to remove any remaining oil or polish residue. Apply the alcohol to a microfiber towel and wipe the surface in a circular motion.
Step 5: Give It a Final Touch
Step 5: Give It a Final Once-over/Dry/Clean
Before applying the ceramic coating, it’s important to give the paint surface a final check and ensure it’s completely clean and dry. If needed, use a microfiber towel to wipe down the surface and remove any residues or water spots.
Step 6: Apply the Ceramic Coating
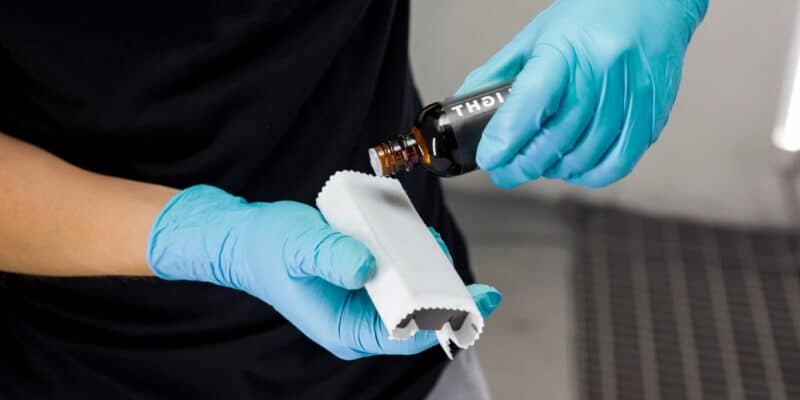
Apply the ceramic coating using an applicator pad. Apply a few drops of the coating to the pad and spread it evenly over a small section of the surface. Work in small sections to ensure complete coverage. After applying the coating, wait a few minutes to allow the coating to bond with the paint.
With the paint surface cleaned and prepared, you may apply the ceramic coating. Follow the manufacturer’s instructions for the best results. However, as a general rule, you want to:
1. Shake the ceramic coating bottle well to thoroughly mix the product.
2. Apply a few drops or a thin line of the ceramic coating onto the applicator pad or cloth.
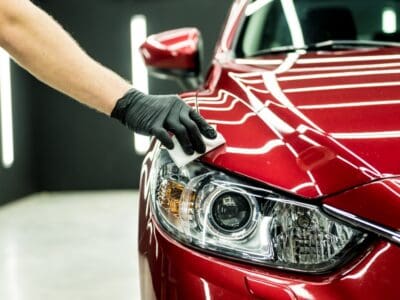
3. Apply the ceramic coating onto the paint surface using light, overlapping motions. Work on small sections at a time and avoid applying too much pressure to prevent streaks or uneven application.
4. Allow the ceramic coating to sit on the paint for the time specified by the manufacturer. This allows the coating to bond with the paint surface properly.
5. Use a clean and lint-free microfiber towel or the material recommended by the manufacturer to buff off the excess coating. Again, use light and circular motions.
6. Continue this process until the entire vehicle is coated.
Tip
It’s important to follow the manufacturer’s instructions for the specific ceramic coating product you’re using, including the recommended curing time, as it may vary depending on the brand and type of coating.
Step 7: Let It Cure
After applying the ceramic coating, let it cure properly to ensure the best results. Curing time may vary depending on the brand and type of ceramic coating, so be sure to follow the manufacturer’s instructions.
Just ensure to park your vehicle in a dry and dust-free area, preferably indoors or under a cover, to protect it from environmental contaminants while curing. Also, Avoid getting the car wet during this curing period. After curing, you can perform a water test or inspect the coating to ensure it has properly bonded.
Step 8: Maintain It
Once the ceramic coating has fully cured, maintain it to ensure its longevity. Regularly wash the car using a gentle car wash soap and microfiber towels while avoiding harsh chemicals or abrasive tools that can damage the coating. Also, consider using a ceramic coating spray every few months to enhance the hydrophobic properties and prolong the durability of the coating.
Common Ceramic Coating Fails
There are several reasons why ceramic coatings may fail to perform as expected. Here are some common ones:
Improper Surface Preparation
Failing to thoroughly clean and decontaminate the paint surface before applying the ceramic coating can result in poor bonding and reduced effectiveness.
Incorrect Application Technique
Applying too much or too little ceramic coating, not allowing proper curing time, or failing to follow the manufacturer’s instructions can lead to uneven coverage and reduced durability.
Environmental Damage
Exposure to harsh weather conditions, acidic substances, bird droppings, or other environmental contaminants can damage the ceramic coating and reduce its performance over time.
Improper Maintenance
Failing to follow proper maintenance practices, such as using good car wash soaps and microfiber towels for washing, can degrade the ceramic coating and reduce its longevity.
Low-Quality or Counterfeit Products
Using subpar or counterfeit ceramic coating products can result in poor performance and premature failure.
Ceramic Coat Your Car Like a Pro
Ceramic coating is an effective way to protect and enhance the appearance of your car’s paint surface. By following the steps outlined in this article and using high-quality products, you can achieve a professional-looking ceramic coating that provides long-lasting protection against environmental contaminants and UV damage.
If you’d like to get your car ceramic coated, see our cost breakdown for both pro and DIY ceramic coating.
Ceramic Coating FAQs
What Is Ceramic Coating Made Of?
Ceramic coating is made of nano-ceramic particles of silica dioxide (SiO2) suspended in a liquid polymer. However, different manufacturers have different additives and formulations.
Can You Mess up Ceramic Coating?
Yes, you can mess up ceramic coating if not applied or maintained properly. Common mistakes include uneven application, incomplete surface preparation, premature exposure to water before curing, and using harsh chemicals or abrasive tools for maintenance.
Can You Wax Over Ceramic Coating?
Yes, you can wax over ceramic coating. However, it’s not necessary, as the coating itself provides even better, long-lasting protection than waxing.
How Long Does Ceramic Coating Last?
The longevity of a ceramic coating depends on various factors, such as the quality of the coating, the application process, and the maintenance routine. Typically, a ceramic coating lasts 1 to 5 years, but some higher-quality products can last longer with proper care.
Does Ceramic Coating Need Maintenance?
Yes, a ceramic coating needs maintenance to ensure its effectiveness and longevity. Regular washing with gentle car soap, using microfiber towels, avoiding harsh chemicals or abrasive tools, and periodic application of a ceramic coating maintenance spray can help maintain the coating.
How Long Until You Can Wash Your Car After Ceramic Coating?
How long until you can wash your car after ceramic coating depends on the curing time. Generally, it’s recommended to wait at least 24 to 72 hours before washing the car after applying a ceramic coating. However, it’s important to follow the specific instructions given by the manufacturer for the best results.


